Unlike many of our other trips, we really did feel unprepared for a long time before heading to Japan. There were a number of aspects I wish I knew months in advance, so I wouldn’t have been so stressed, so I have tried to list them all in order to help anyone heading out there.
JR Pass
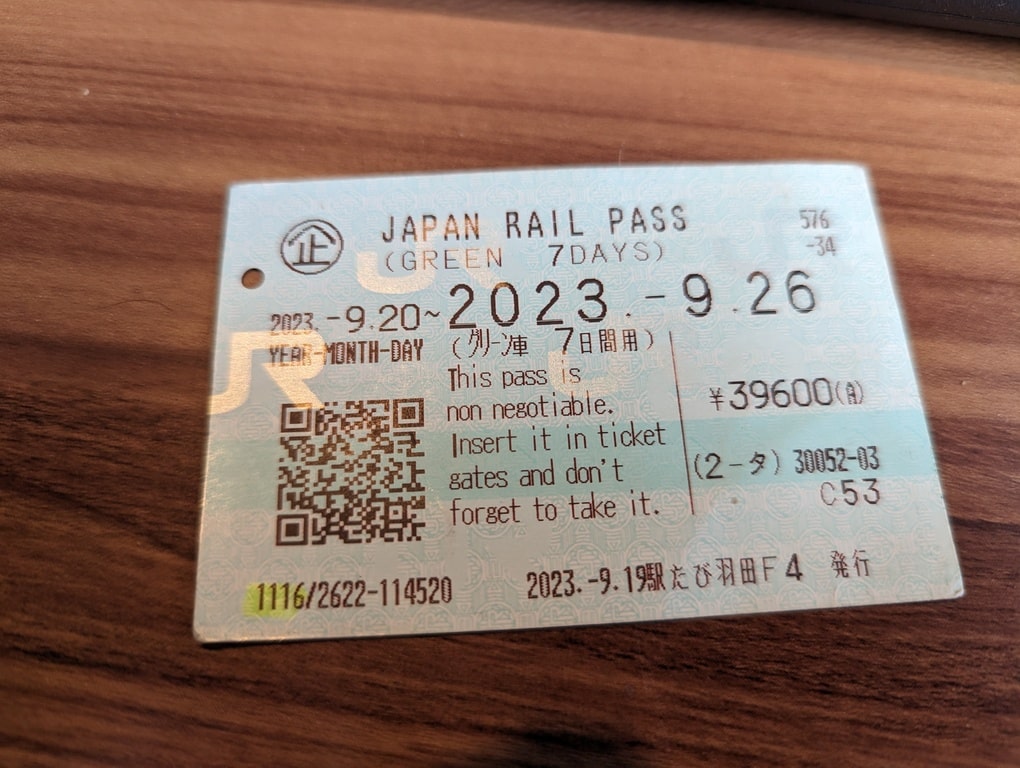
We ordered our JR pass in advance, while we received the voucher and receipt for it through the post to the UK.
Then, when we landed in Tokyo, you collect the actual pass from the JR East Travel Service Centre in the airport (terminal 2). It can be quite a long queue, they gave warnings of up to an hour but it only took us 15 minutes so we must have just got lucky.
Here they will print out your actual ticket which you need to keep on you and put in the machine for each JR line trip you take.
What I wasn’t aware of is that this will also cover a few basic trips, as well as your longer journeys. So yes, it covered us for our trips from Tokyo to Mount Fuji, Kyoto and Osaka, but it also covered some of our trains within Kyoto and Tokyo as well, which was useful. For the rest, such as the subway, you will need a Suica card, which I will get onto in a moment.
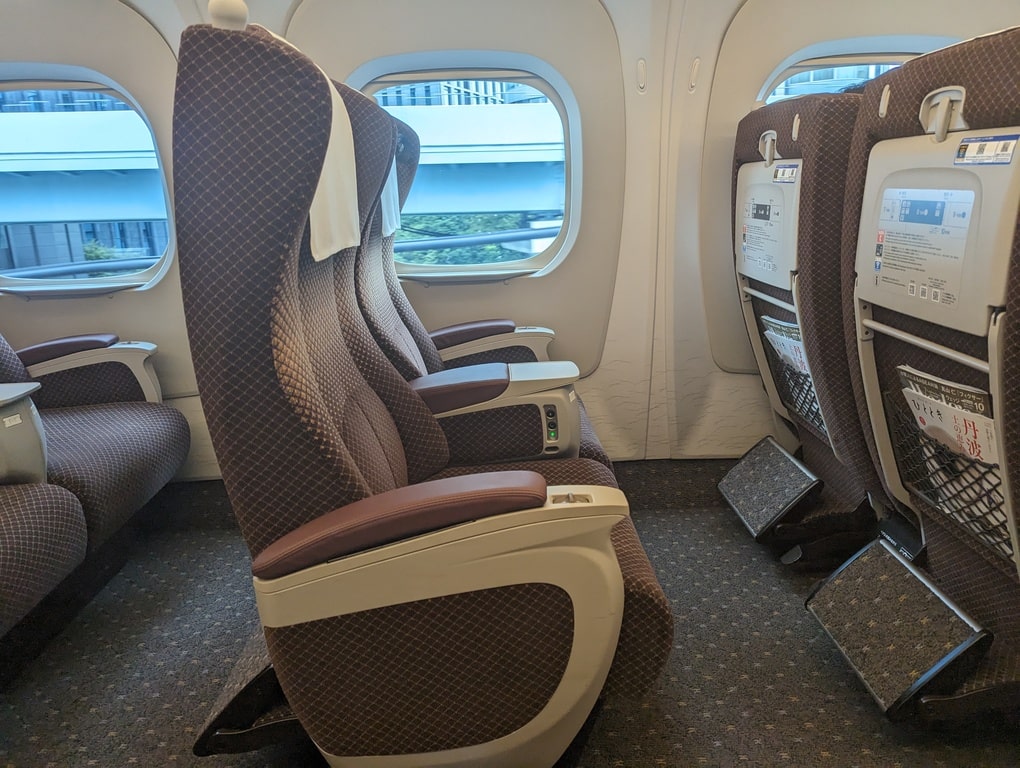
You can get a basic JR pass, or you can get the JR Green Car. We opted for the Green Car, as it didn’t cost a huge amount more and it meant we would have luxurious seats for our journey, well I’m very glad we did and I would recommend this if you’re travelling around Japan, providing it fits to your budget.
The seats could stretch back quite far, so you could have a good nap, although the bullet train goes so fast we were never on long enough for a snooze. Our longest journey was 3 hours, from Osaka to Tokyo.
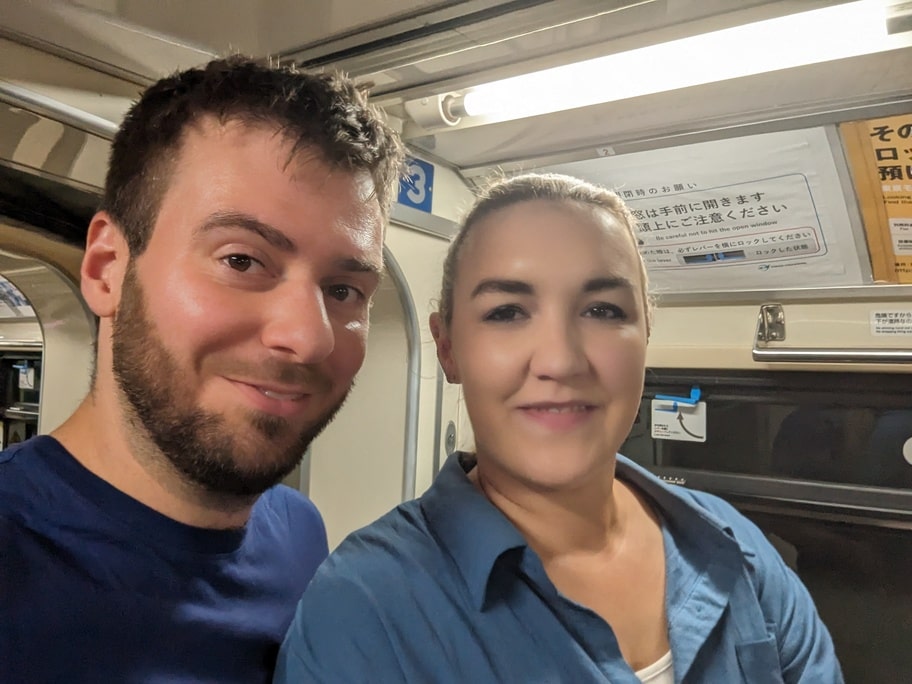
To offer an idea of our journey, we took a 2 hour trip to Mount Fuji from Tokyo, plus 2 hours back at the end of the day. The next day we took a 2.5 hour train to Kyoto, stayed a few days, then a 20 minute train to Osaka, stayed a few more days, then it was a 3 hour train back to Tokyo.
At the Airport JR Service Centre, you can get your pass, but if you want to reserve your seat on all your future trips, you will have to do it elsewhere. They will let you book a trip that day if you wish, but for multiple reservations, you have to head to a local JR centre, of which there were many, such as in Shibuya or Shinjuku. We went to one and booked all of our seats very quickly and easily, but it’s worth doing on your first day so you don’t have to worry about being sat apart if you’re with someone.
Suica Card
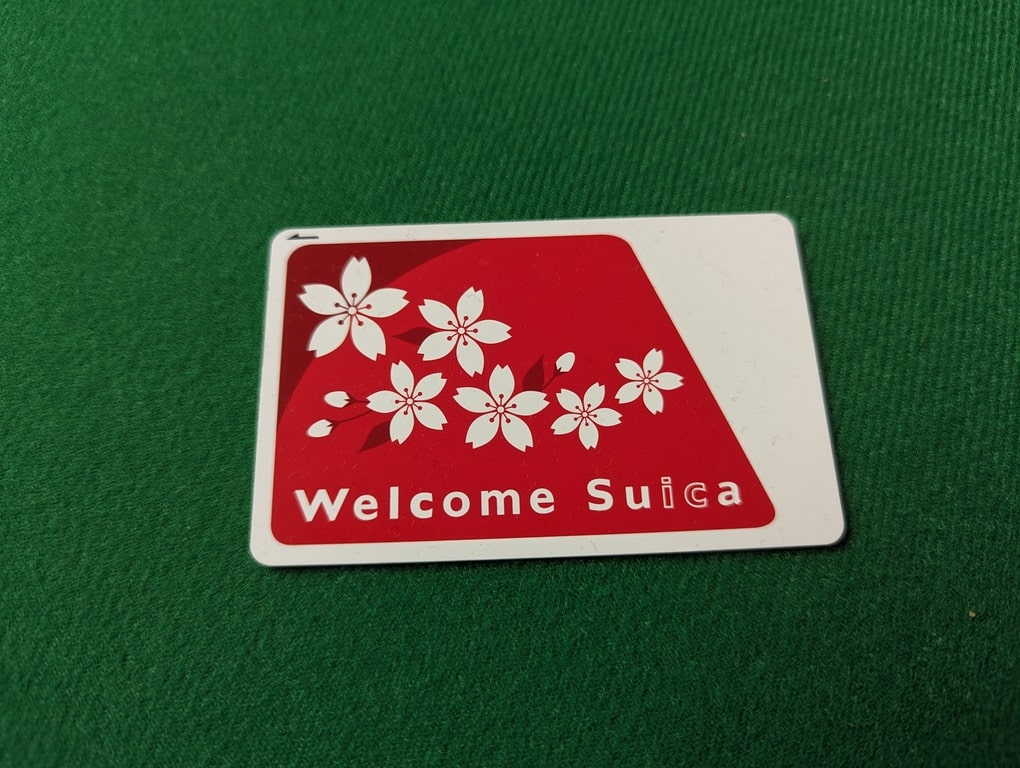
This one we didn’t arrange in advance. We read numerous articles stating you should download the app, but the app kept showing it couldn’t be downloaded in our country. We also read they were out of microchips so we couldn’t get a proper card.
All the worrying was for nothing. Once we landed, we got a Suica Welcome card, which lasts 28 days, easily long enough for our whole journey. We ordered it in the JR East Travel Service Centre while getting our JR pass, but you can also get it at a separate section within the station, however it seemed quicker and easier to get it from the same desk as we were already there.
You can initially either top it up with 1,000 yen or 2,000 yen, we burned through the 2,000 yen in no time at all, so that was the better option for us.
It should be stated that you can’t get any money back after loading it onto the welcome Suica card, so you don’t want to put on too much, but it is really useful and you also don’t want to get caught short, so it’s worth checking at the machines how much you have on the card.
Much like tapping your bank card at home, you just tap the card against the machines on the barriers and they open straight away, meaning you don’t have to worry about buying individual tickets at a machine.
I think we spent around 4,000 yen each for a 10 day trip, which is about £22 each.
Language
When I started researching Japan, I saw multiple videos and read numerous articles that stated people in Japan didn’t speak a word of English.
I then set out a 9 month strategy of doing 10 minutes of Japanese classes per day. I learned Hiragana and Katakana (but slipped up with Kanji) and didn’t take a day off for the entire 9 months.
However, once I was out there, I quickly realised people did speak English everywhere I went. We did only go to the big cities, Tokyo, Osaka and Kyoto, whereas if I went to a smaller village then it might have been needed more.
I am very relieved I did learn the language as it did come in use for trains and to generally understand what people were saying. But if you don’t want to learn the whole language, then below are some of the basics you have to know:
Ohayo Gazai Masu – pronounced ‘oh-hi-oh gazai mass‘: Good morning
Konnichiwa: Hello
Arigatou Gozai Masu – pronounced ‘arry-gateau gozai mass‘: Thank you very much (or just arigatou for thanks)
Hai: Yes
iie: No
Sumimasen – pronounced ‘sue-me-ma-sen’: Excuse me or sorry
Mizu – water
Kudasai – please – ‘Please’ can also be onegaishimasu
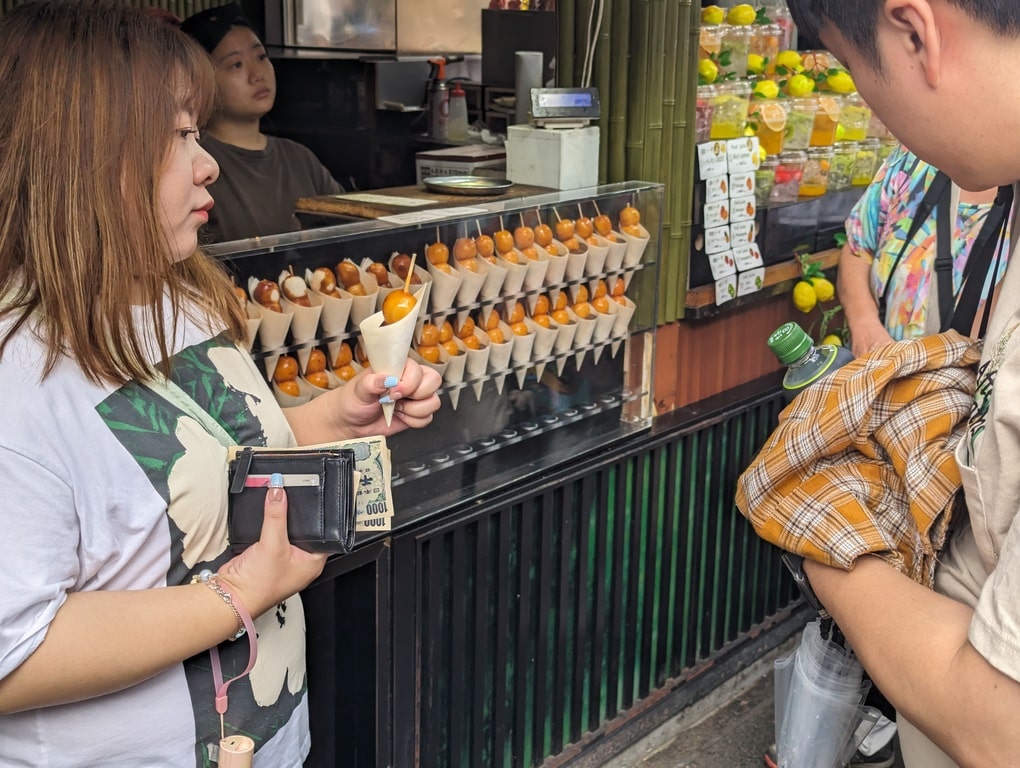
Many of the food names are recognisable as they have crossed over, such as udon, sushi, ramen, katsu and teriyaki.
WIFI Box
You have two options when it comes to using your mobile data while in Japan. Fortunately, me and Raquel went for different options, so we can demonstrate the two choices you have.
I opted to use my mobile data with a travel data pass. I’m with EE, so I had to message TRAVEL to 150 before flying out. This turns on your travel pass for when abroad, so you get charged a set price for each day you use data abroad. However, when you’re out there and it turns on, you still need to click on a link you get text to you and confirm you want to use it, each day, which is a bit of a faff.
The charge was £7.80, not exactly cheap, even worse when you consider they only give you 150mb of data, just enough to use Maps and to navigate us around the city but not to really use any apps at all.
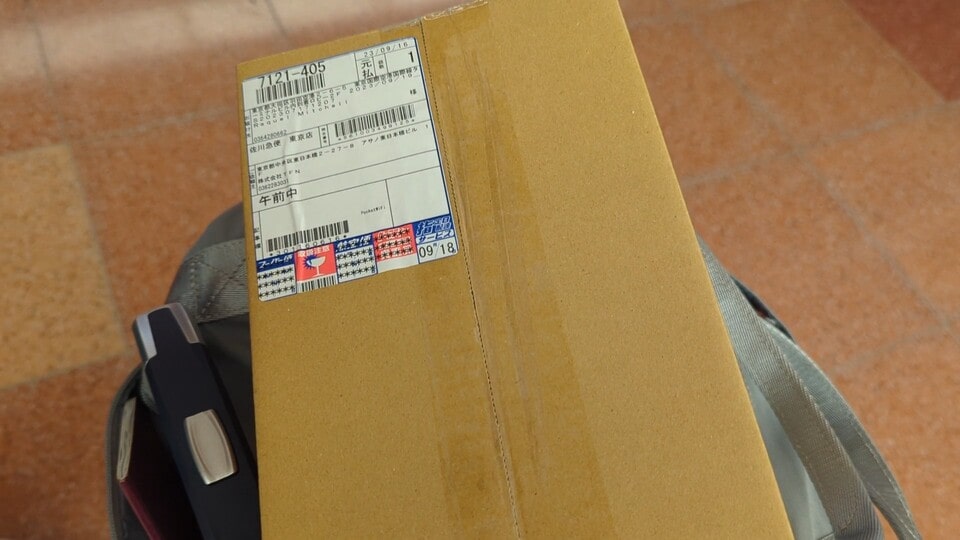
The alternative option Raquel went for was the pocket WiFi rental service. You order this from home, then you can collect it at the airport, again at terminal 2 like the JR pass. It will be in a box and was annoyingly complicated to first setup and find all the codes, but once we got it sorted then we were good for the rest of the trip.
You also need to charge the battery each evening so it doesn’t die, so make sure you have enough chargers and adaptors. The amount of data we got was significantly more, but when it runs out it inevitably just switches off, so make sure not to have anything being backed up while using the WiFi and try not to upload or download anything, such as pics and videos.
One issue with the Wifi box was that it isn’t setup from the start, while we needed the internet to work out how we got to our hotel from the airport with Google Maps, so I turned on my data for day one, before gradually switching to the Wifi box after a couple of days (then I didn’t look back).
The cost for our trip to have the WiFi box was £80, so it works out as a similar cost to using your data, but with more data provided, so generally a better option, but it’s worth having your mobile data setup just in case it runs out or for people before it’s working.
At the end, you just post it back with the provided envelope, which can be done for free at a post box. We wanted to use it all the way until the end, so we posted it within the airport on the last day, with a number of post boxes in the airport before you go through security.
Neck Fans
This was a complete game-changer. I have been to a large number of hot countries and just had to deal with the heat, and not deal with it very well I should mention.
But before this holiday we had come across neck fans, which appear like headphones. You wear them around your neck and they blow cool air upwards below your ears. It made a huge amount of difference, I had mine on all day virtually every day in Japan.
The important thing to remember is that you want a strong battery so it lasts the full day. They were available for £12 on Amazon, but I went for one with double the battery life (4000mAh) and that worked perfectly. Of course, you have to charge them (via USB) each evening for the next day.
Smoking Booths
Neither of us smoke, so this didn’t directly affect us, but it is certainly something you need to know if you are a smoker. We didn’t see people smoking anywhere, it completely caught us by surprise.
People didn’t smoke outside at all, there were regulations in place so most areas we were in you would get a fine if you smoked there. This is especially true in busy public streets. You also can’t smoke while walking virtually anywhere in Japan.
Instead there were smoking rooms set out, which looked pretty tight for space, which people can go in and smoke. It really made it look very unappealing to smoke, so I guess a good deterrent.
It reminded me of the scene from IT Crowd where Jen has to walk for miles to find a smoking booth she can squash into.
Japanese Toilets
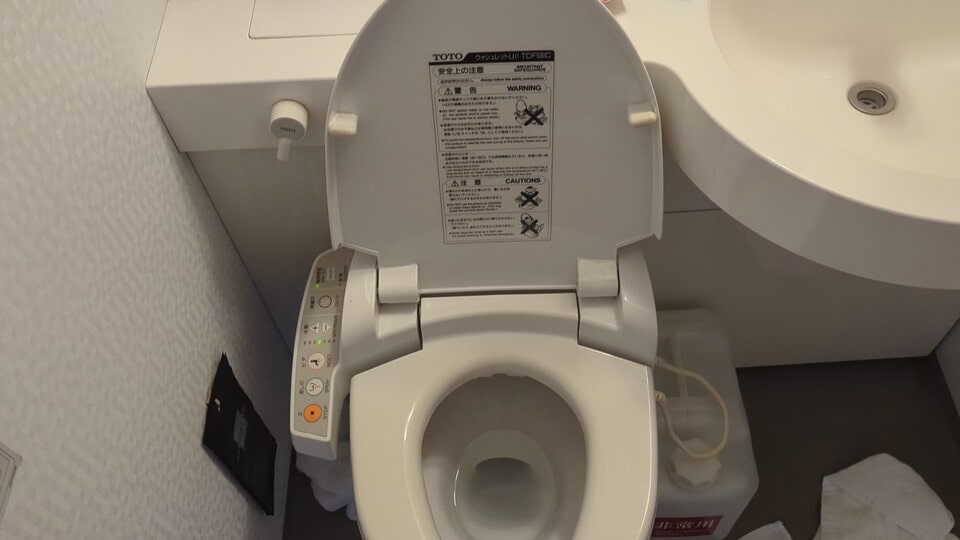
We were a little nervous beforehand, but we really didn’t have to be. Every single toilet had toilet paper, so if you don’t fancy using the crazy spraying machine, you don’t have to, but I’ll admit I quite enjoyed it once I got my head around it.
Every toilet did however use single ply toilet paper, the thinnest of the thinnest, even the posh hotels we stayed in.
The toilet spray machines were very easy to use. You have a button for the ‘front’ or the ‘back’, press it to get it going, then a stop button for when you’re done. You can then use the toilet paper to dab yourself dry.
They had toilet seat warmers, which Raquel loved, while they also had ‘deodorisers’ to tackle any bad smells. Some even had sounds or music coming out, not that I mucked around with that at all.
A few had buttons you could press so it would lift or drop the toilet seat, meaning you don’t have to touch it at all!
The hardest part was sometimes finding the flush, as they all seemed to have them in different positions around the toilet.
Cash Society
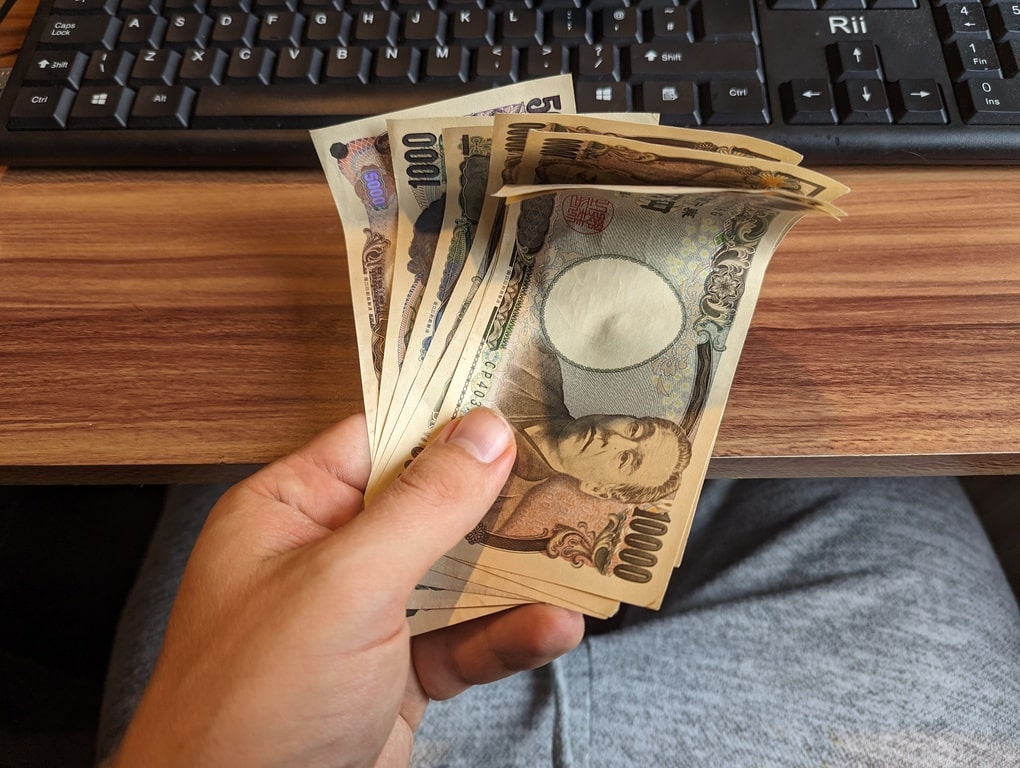
Just as we had read, it was very much a cash society, contrasting with back home where cash is almost extinct. For this reason, it is worth taking out quite a bit of cash before you head out there.
We took out a hefty amount and didn’t use our cards once. For the two of us, we took out £1,200 (£600 each), but we had £300 left at the end of our 10 day holiday, so £900 for two people seemed to be the perfect amount.
That works out as approximately £45 per day per person, but it should be highlighted that our accommodation and most of our travel was pre-paid, so that was food & drink, entry to attractions and general experiences.
Of course, the amount you require depends on what you book, how often you plan on eating out vs 7/11 and whether you plan on drinking a lot.
Also, it’s worth mentioning, tipping isn’t a thing in Japan, so you don’t have to worry about working out the exact amount. In fact, at one point I tried leaving a tip and she quickly shouted no (in a friendly way) and gave me my change.